

C4
Guest

Alright, this is part2 of this Basic Signature Tutorial.

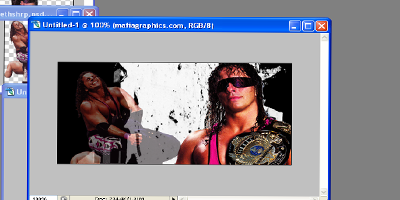
Once you have a picture like the one above, drag another picture; an action psd of some sort. Since my picture was Bret Hart. I dragged a PSD of him doing the sharpshooter. Follow Step1 and do the same thing you did earlier.
Decrease it's opacity to around 50% by doing what is done in the picture below.. for a better look. And move it around to fit your signature.

Once you are satisfied with the result, go to Layer>New Adjustment Layer>Color Balance a window like this will pop up:
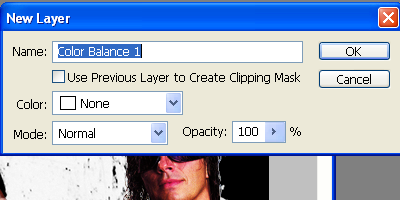
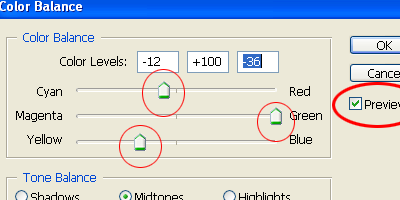
Go with the default settings of Photoshop and click OK, Now mess around with the bars for good colors. Make sure the PREVIEW is checked at the bottom.
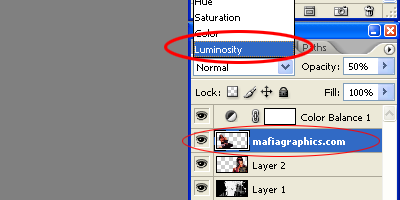
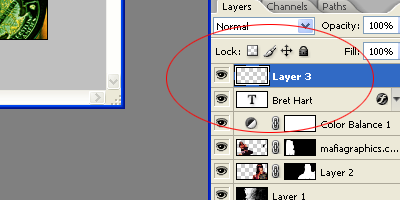
Once you are done messing around with color balance, check if everything is alright. Here is what I had in my Layers Window.
1) Background Layer with brushes on it.
2) Bret Hart psd
3) Bret Hart action psd
4) Color Balance

Now select the action psd and change the blending mode to luminosity, just like it's done in the picture below:
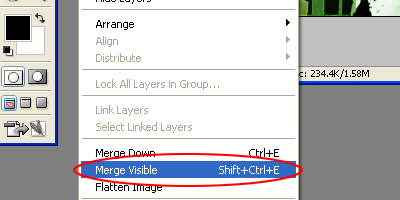
Looks freaky? Bad? Horrible? Worse than before? Don't worry it's going to be alright. Next go to Layer>Merge Down Like this picture shows:
Now it's time to make some adjustments, use the crop tool/ Marquee tool/ Move tool and everything else to make the picture look good, you can add more brushes if you want to.. or do anything else you want with the sig.
Once you have made the adjustments select the TYPE TOOL and click on the sig and type the desired text/ caption that you want. If you don't have a good font, then:
1) Download the font by Google *Explained in part1*
2) Unzip, Extract the font.
3) Drag the font file to X*:/Windows/Fonts
The font will load itself into photoshop. Select a good font and type the desired text/ caption you want and then go to Layer>Blending Modes Drop a nice black shadow and mess around if you want to.

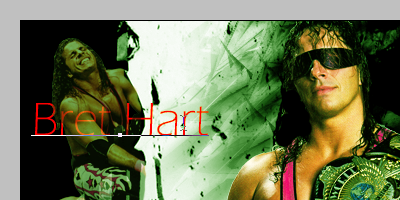
You should have something like this now:
Now comes the finishing touch on your signature, it's the last step of this tutorial.
Press CTRL+SHIFT+N on your keyboard or go to Layer>New Layer
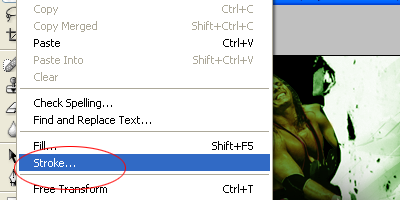
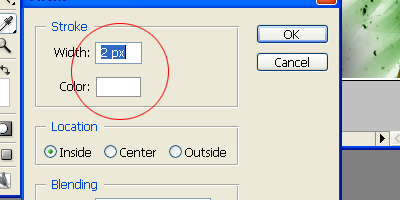
Then press CTRL+A with the new layer selected to select the canvas and go to EDIT>STROKE for a nice border.
Select a 2PX White stroke and press OK. Then again select the canvas by CTRL+A and then again go to EDIT>STROKE this time add a 1PX Black stroke. You can choose any color, but black and white look good.
And there it is, your signature! That's the final touch and you have completed this tutorial. Amazing right? Now go to Layer>Flatten Image and save the picture!
You should end up with something like this:

You can make similar signatures using these basic steps! Hope that you learned something from this tutorial.
And yeah, the people who try this out and post their result will get Rep from me! Bye! :sq_yellow_closedeye
Once you have a picture like the one above, drag another picture; an action psd of some sort. Since my picture was Bret Hart. I dragged a PSD of him doing the sharpshooter. Follow Step1 and do the same thing you did earlier.
Decrease it's opacity to around 50% by doing what is done in the picture below.. for a better look. And move it around to fit your signature.
Once you are satisfied with the result, go to Layer>New Adjustment Layer>Color Balance a window like this will pop up:
Go with the default settings of Photoshop and click OK, Now mess around with the bars for good colors. Make sure the PREVIEW is checked at the bottom.
Once you are done messing around with color balance, check if everything is alright. Here is what I had in my Layers Window.
1) Background Layer with brushes on it.
2) Bret Hart psd
3) Bret Hart action psd
4) Color Balance
Now select the action psd and change the blending mode to luminosity, just like it's done in the picture below:
Looks freaky? Bad? Horrible? Worse than before? Don't worry it's going to be alright. Next go to Layer>Merge Down Like this picture shows:
Now it's time to make some adjustments, use the crop tool/ Marquee tool/ Move tool and everything else to make the picture look good, you can add more brushes if you want to.. or do anything else you want with the sig.
Once you have made the adjustments select the TYPE TOOL and click on the sig and type the desired text/ caption that you want. If you don't have a good font, then:
1) Download the font by Google *Explained in part1*
2) Unzip, Extract the font.
3) Drag the font file to X*:/Windows/Fonts
The font will load itself into photoshop. Select a good font and type the desired text/ caption you want and then go to Layer>Blending Modes Drop a nice black shadow and mess around if you want to.
You should have something like this now:
Now comes the finishing touch on your signature, it's the last step of this tutorial.
Press CTRL+SHIFT+N on your keyboard or go to Layer>New Layer
Then press CTRL+A with the new layer selected to select the canvas and go to EDIT>STROKE for a nice border.
Select a 2PX White stroke and press OK. Then again select the canvas by CTRL+A and then again go to EDIT>STROKE this time add a 1PX Black stroke. You can choose any color, but black and white look good.
And there it is, your signature! That's the final touch and you have completed this tutorial. Amazing right? Now go to Layer>Flatten Image and save the picture!
You should end up with something like this:
You can make similar signatures using these basic steps! Hope that you learned something from this tutorial.
And yeah, the people who try this out and post their result will get Rep from me! Bye! :sq_yellow_closedeye