

C4
Guest

This is my first tutorial, to teach people how to make Basic Signatures for themselves; it's pretty easy and almost everyone will understand it.
CHECKLIST:
1) Adobe Photoshop CS3
2) Wrestler PSDS - Download from http://www.Italianpsd.net or http://www.psdprotocol.com
3) Good fonts - Download from www.1001freefonts.com
4) Good Brushes - Google "Photoshop *Version* Brushes Download"
5) A good creative mind, and Rep/ Thankyou for C4 :shifty:
Ok, let's start with our tutorial. Open up Photoshop; I use Photoshop CS2 and it's the best version in my opinion.
Now go to File > New and select the settings you want, C4's recommended size for a sig is 400*200 pixels.
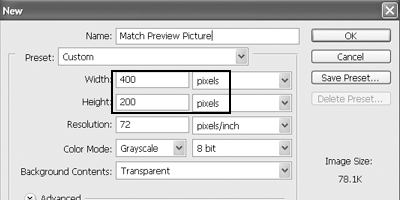
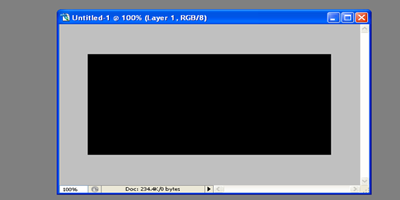
Once you're done, click OK and press "D" on your keyboard to make sure the colors for the background and foreground are black and white. Now grab the FILL tool from the toolbox and fill a black color in the sig.
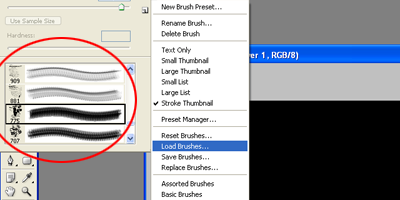
Select the brush tool and go to File>Load>LoadBrushes and select your brushes, the one's which you have downloaded.
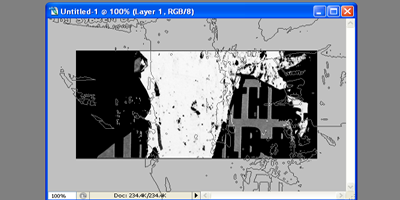
Grab some decent brushes and spray over the sig with a bright white color, and you will get something like this:
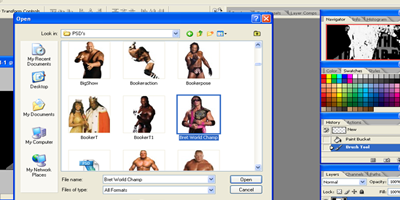
Now comes the main part. Open up the ".psd/.png" Wrestler picture file which you downloaded earlier. I have a Folder in 'My Documents' with the name of "PSD" and I save all of the pictures which I download, over there.
Have something like that. Once you select your picture click OK. I selected Bret Hart as an example over here.
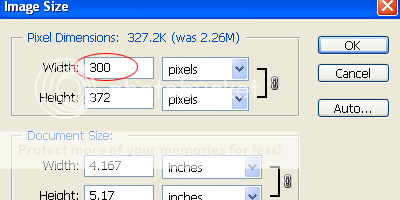
Too bigggg huh?? Don't use 'Free Transform' or any other tool to make it smaller. It f*cks the resolution of the psd. Go to Image>ImageSize
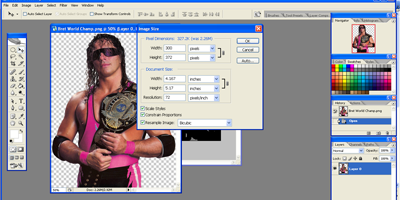
A window like the one above will pop up, decrease the pixels of the width and make it around 300 or 250. Once you adjust the width; the height will be adjusted itself. If you make the picture too small then use the history box to go back to the original picture.
Move the PSD to your signature by using the MOVE tool.
Then Press CTRL+J on your keyboard or select 'Duplicate Layer' by right clicking on the PSD Layer menu.
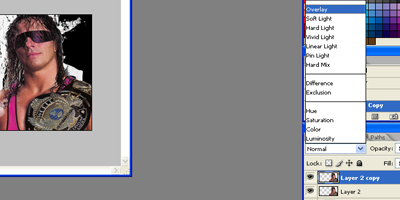
With the Duplicated Layer selected, change the blending mode to 'overlay'. Just like it's done in the picture above.
By this time, you should have something like this:

Are you ready to move forward? If yes... then lets go! :bounce:
This was the basic part of this tutorial, now it's a little bit advanced. Check this Thread for Part2 of this "Basic Signature Tutorial":
http://impactwrestling.com/forum/showthread.php?p=216487#post216487
CHECKLIST:
1) Adobe Photoshop CS3
2) Wrestler PSDS - Download from http://www.Italianpsd.net or http://www.psdprotocol.com
3) Good fonts - Download from www.1001freefonts.com
4) Good Brushes - Google "Photoshop *Version* Brushes Download"
5) A good creative mind, and Rep/ Thankyou for C4 :shifty:
Ok, let's start with our tutorial. Open up Photoshop; I use Photoshop CS2 and it's the best version in my opinion.
Now go to File > New and select the settings you want, C4's recommended size for a sig is 400*200 pixels.
Once you're done, click OK and press "D" on your keyboard to make sure the colors for the background and foreground are black and white. Now grab the FILL tool from the toolbox and fill a black color in the sig.
Select the brush tool and go to File>Load>LoadBrushes and select your brushes, the one's which you have downloaded.
Grab some decent brushes and spray over the sig with a bright white color, and you will get something like this:
Now comes the main part. Open up the ".psd/.png" Wrestler picture file which you downloaded earlier. I have a Folder in 'My Documents' with the name of "PSD" and I save all of the pictures which I download, over there.
Have something like that. Once you select your picture click OK. I selected Bret Hart as an example over here.
Too bigggg huh?? Don't use 'Free Transform' or any other tool to make it smaller. It f*cks the resolution of the psd. Go to Image>ImageSize
A window like the one above will pop up, decrease the pixels of the width and make it around 300 or 250. Once you adjust the width; the height will be adjusted itself. If you make the picture too small then use the history box to go back to the original picture.
Move the PSD to your signature by using the MOVE tool.
Then Press CTRL+J on your keyboard or select 'Duplicate Layer' by right clicking on the PSD Layer menu.
With the Duplicated Layer selected, change the blending mode to 'overlay'. Just like it's done in the picture above.
By this time, you should have something like this:
Are you ready to move forward? If yes... then lets go! :bounce:
This was the basic part of this tutorial, now it's a little bit advanced. Check this Thread for Part2 of this "Basic Signature Tutorial":
http://impactwrestling.com/forum/showthread.php?p=216487#post216487


")
